Use IIS Proxy With a Sub-Path
Demonstrate how to use HomeGallery with IIS used as a proxy with base
path /pictures
Install URL Rewrite Module (if not already installed)
- Download and install Web Platform Installer from here Web Platform Installer : The Official Microsoft IIS Site
- Run Microsoft Web Platform Installer from the Start Menu.
- Search for "url rewrite".
- Locate URL Rewrite 2.1 and click Add:
- Search for "application request routing"
- Locate Application Request Routing 3.0 and click Add.
- Click Install and "I Accept" to install the add in's
- Click Finish.
Enable ARR
- In IIS Manager click on your server. Double-click Application Request Routing Cache:
- Click Server Proxy Settings in the Action pane.
- Check the Enable Proxy box.
- Click Apply in the Action Pane.
Setup Website (if it doesn't already exist)
Setup your root website in IIS Manager as normal with binding, e.g. www.mysite.com
This is the site you want to put your photos in a sub-path below.
Setup Url Rewrite for Proxy
With the new website selected double double-click URL Rewrite:
- Click Add Rule(s)... in the Action pane.
- Select to create a Blank Inbound Rule.
- Configure the rule as shown below:
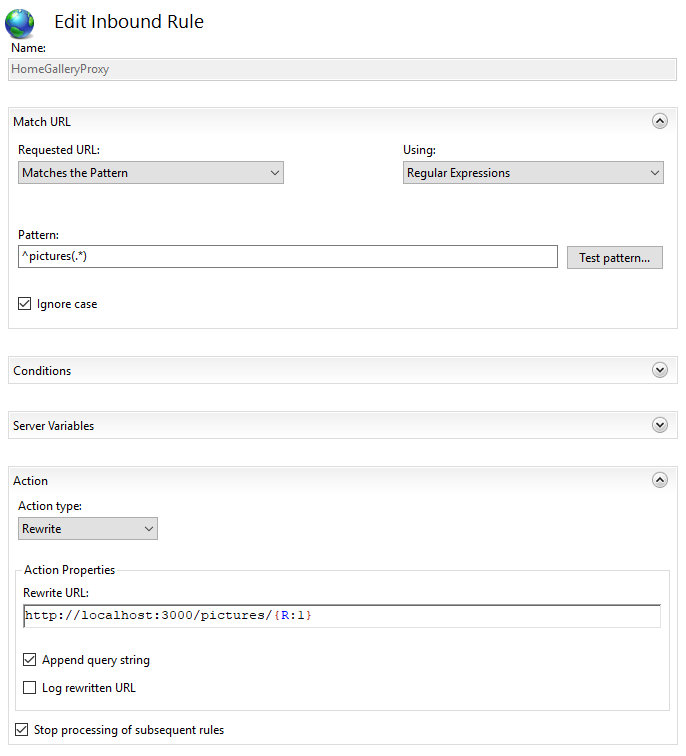
- Click Apply.
Configure Home Gallery
Configure the prefix in the server section of gallery.config.yml as
follows:
Start (or restart) Home Gallery.
Test the Site
- Test the local site by opening http://localhost:3000/pictures in your browser.
- Test the remote site by opening http://www.mysite.com/gallery in your browser.
web.config File
The web.config file is shown below for reference: